Cinnamon Cheesecake
Well hello! I hope you’ve had a good couple of months 🙂
I’d love to wow you with hilarious stories and adventures from my “absence” but the truth is I’ve really just had major writer’s block oh and I’m opening a cafe.
Yup…that’s right! I’m finally opening a cafe and pastry shoppe! <insert insane grin here> So basically I’m exhausted, I have no time and I couldn’t be happier 🙂 If you’d like to see more of the cafe’s progress you can visit our facebook page here. I’ll still be blogging as the purple spoon but the cafe will be The Wooden Spoon…so if you’re ever in NY, stop on by!
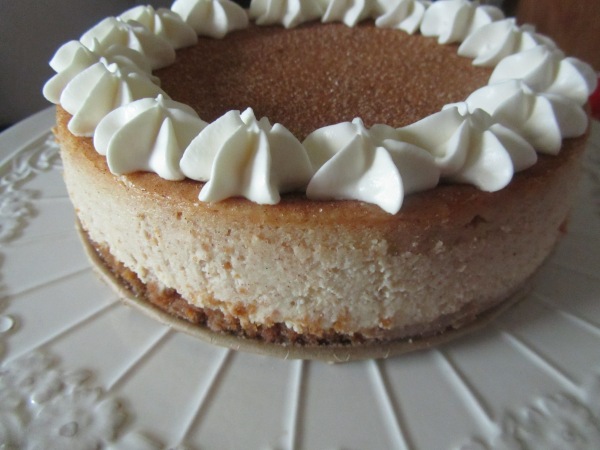
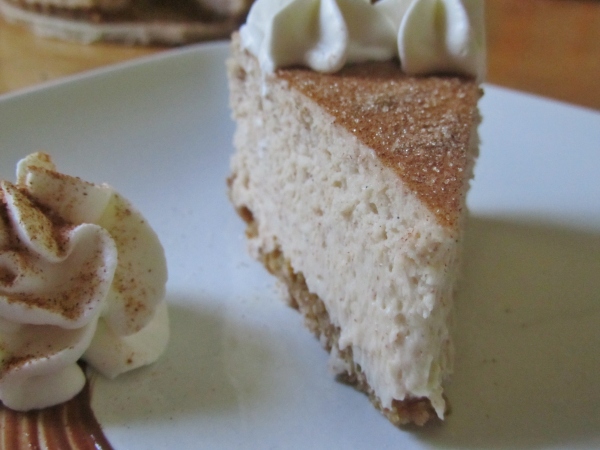
On to this scrumptious cheesecake though… I had been wanting to do a funfetti cheesecake as a “fun” way to announce the cafe but I seem to crave cinnamon and cream cheese this time of year (take a look at the last two year’s posts!). And so cinnamon won out and this time it’s combined with cream cheese and mascarpone cheese. You really can never go wrong with cinnamon and this cheesecake is no exception; it’s creamy and rich but not too sweet and the cinnamon adds that fragrant spicy balance that no other spice can. I may have served mine with a bourbon whipped cream but truth be told this cheesecake needs nothing to be enjoyed!
One Year Ago: Cheesecake Flan
Two Years Ago: Cinnamon Sugar Tortillas with Mascarpone Mousse
Cinnamon Cheesecake
Yields 16-24 servings
Ingredients:
1 1/4 cups graham cracker crumbs
3 tablespoons sugar
1/3 cup butter, melted
2- 8 ounce packages cream cheese, softened
16 ounces mascarpone cheese, softened
1 1/2 cups sugar
4 large eggs, at room temperature
1/4 cup heavy cream
1 tablespoon vanilla bean paste (or pure vanilla extract)
2 teaspoons cinnamon
cinnamon sugar
whipped cream
Directions:
1. Preheat oven to 350 degrees (F).
For the crust: Line the bottom of a 9 inch spring form pan with parchment paper. In a medium size mixing bowl, mix together graham cracker crumbs, sugar and melted butter. Press the crumb mixture into the bottom of the spring form pan. Wrap the outside of the pan in 2 sheets of heavy duty aluminum foil. Bake in preheated oven for 7 minutes or until lightly browned. Set aside.
2. Fill a tea pot or medium pot with water and bring to boil.
3. For the cheesecake: In a large mixing bowl beat cream cheese and mascarpone cheese for about a minute until all combined. Keep the mixer at medium low speed and gradually add sugar, increasing speed to medium once all the sugar has been added. Add eggs one at a time, scraping down the sides of the bowl with a rubber spatula in between each addition. Add heavy cream, vanilla bean paste or extract and cinnamon and beat on medium speed just until combined.
4. Very lightly butter the sides of the spring form pan and pour batter into prepared pan. Set a roasting pan or other large pan into the preheated oven. Place the spring form pan inside it and pour the boiling water (from step 2) into the roasting pan so that it comes half way up the sides of the spring form pan. Bake for 1 hour or until middle is set but still quivers like gelatin when gently touched.
5. Remove spring form pan from the water bath. Let cool for a couple minutes and then CAREFULLY remove the foil from the outside of the pan (you may need two people to do this the first time). Let the cheesecake cool to room temperature and then cover and refrigerate over night or at least 8 hours.
To serve: run a thin knife along the inside of the pan and then slowly unlock the spring form. Slide the cheesecake off the parchment paper and onto a serving platter. Sprinkle the top evenly with cinnamon sugar (a combination of 1 tablespoon of sugar to 1 teaspoon of cinnamon) and serve with whipped cream.
Chunky White Chocolate Chip Cookies
The first recipe I learned to make was chocolate chip cookies. Basically they were about the only thing I baked other than the occasional boxed brownie until high school. I still remember sitting in health class (ironic, I know lol) chatting and probably eating cookies with my best friend when she requested that I make the same cookies but with white chocolate chips instead. Blasphemy! White chocolate chips instead of chocolate?! But I obliged 🙂 and much to my disbelief they were actually pretty good, in fact, I made more of them because they were way better than I ever imagined.
Fast forward a couple years, OK 10, and I was snowed in with the kids again. To escape the madness I whipped up some cookies. But this time instead of just white chocolate chips I added some toasted pecans and toasted coconut hoping to keep the kids away from them for some added flavor boost.
They were delicious. Toasty and chewy, not too sweet, it’s easy to eat several of them without thinking. I brought some to my sister later at the gym (again with the irony!), she text me the next morning; “I forgot to tell you! Those cookies last night were AMAZING! One of my favorites now!”. They really are amazing, I think I might make more of them today 🙂
One Year Ago: Bakery Style Chocolate Chip Muffins
Two Years Ago: Coconut Cupcakes
Chunky White Chocolate Chip Cookies
Yields approximately 20 cookies
Ingredients:
1 1/2 cups flour
1 teaspoon corn starch
1/2 teaspoon baking soda
1/4 teaspoon salt
1/2 cup unsalted butter, softened
1/2 cup brown sugar (light or dark), packed
1/4 cup sugar
1 large egg, at room temperature
1 teaspoon pure vanilla extract
1/2 cup whole pecans
1/2 cup shredded, sweetened coconut flakes
1/3 cup white chocolate chips
Directions:
1. Preheat oven to 350 degrees (F). Line a cookie sheet with parchment paper and set aside. Once the oven is preheated toast the pecans on a separate baking sheet for 5-7 minutes and fragrant. Toast the coconut flakes separately for about 5 minutes or fragrant and golden brown. Set them aside to cool.
2. In a medium sized bowl, stir together the flour, corn starch, baking soda and salt. Set aside.
3. In a large bowl, cream the butter about 3 minutes or until it has the consistency of mayonnaise. Beat in both sugars until light and fluffy, about another 3-5 minutes. Add egg and vanilla and beat until combined. Add dry ingredients and beat on low speed to combine. Make sure to scrape the bottom and sides of the bowl with a rubber spatula to make sure all dough is incorporated.
4. Roughly chop the toasted pecans and then stir them into the dough along with the toasted coconut flakes and white chocolate chips.
5. Using a medium cookie scoop or tablespoon, drop dough in rows on the cookie sheet leaving about 2 inches between each cookie. Bake for 10 minutes, cookies should look very slightly underdone, they will continue to cook on the baking sheet when you take them out. Remove the cookie sheets from the oven and allow the cookies to cool on the sheet for about 2 minutes before transferring them to a wire rack to cool completely. Eat whenever you feel like! Store in an airtight container once cooled, they will stay nice and chewy 🙂
Chocolate Strawberry Shortcake
As much as I tend to despise winter I do love a good blizzard. It keeps you home bound, you get to sleep in, it’s practically a guaranteed pajama day, it’s a perfect excuse for decadent hot chocolate, and I’m not the one shoveling us out afterwards. Well thanks to Nemo I got one of those home bound days 🙂 I slept in to a lazy 7:20 am, I most certainly made hot chocolate and I baked. I baked so much I ran out of flour-it was wonderful.
Most of my experiments involved chocolate and strawberries because that’s the first thing I think of around Valentine’s Day 🙂 While some of the ideas still need tweaking this chocolate strawberry shortcake turned out divine! It’s the perfect blend of an old fashioned shortcake with a chocolate-y twist! With its delightfully crunchy outside and tender, fluffy inside, the traditional buttermilk biscuit is infused with rich dutch cocoa and studded with smooth dark chocolate. Sweet, juicy strawberries and freshly whipped cream make this a unique treat that is light and delectable. For the best results keep all your ingredients cold and be careful not to overmix or over-work the dough.
One Year Ago: Whipped Nutella in Phyllo Cups
Two Years Ago: Valentine Sugar Cookies
Chocolate Strawberry Shortcake
Yields 6-8 servings
*For for detailed pictures of making biscuits visit my traditional strawberry shortcake post and fluffy biscuit post.
Ingredients:
1 pound fresh strawberries, rinsed, hulled and sliced
1 tablespoon sugar
balsamic vinegar
1 ½ cups all-purpose flour
⅓ cup dutch process cocoa powder*
¼ cup sugar
2 1/2 teaspoons baking powder
¼ teaspoon baking soda
1/2 teaspoon salt
4 ½ tablespoons unsalted butter, cold and cut into pieces
2 ounces (1/2 cup) dark chocolate, chopped
¾ cup buttermilk, cold
1 teaspoon pure vanilla extract
1 cup heavy whipping cream
1 teaspoon pure vanilla extract
2 tablespoons sugar
*this is one place you’ll want to use a good quality dutch processed cocoa powder. I use cacao barry extra brute which has a deep reddish brown color and intense chocolate flavor.
Directions:
1. Place the sliced strawberries in a bowl, sprinkle with the 1 tablespoon of sugar and add a small splash of balsamic vinegar. Stir to completely combine, cover with plastic wrap and place in the refrigerator.
2. Preheat oven to 450 degrees (F). Line a baking sheet with parchment paper and set aside.
Sift the flour, cocoa powder, sugar, baking powder, baking soda and salt into a large mixing bowl and whisk until completely combined.
3. Add the butter to the dry ingredients and cut in with 2 knives, a pastry blender or your fingers until the mixture resembles course crumbs and the largest butter pieces are no bigger than the size of small peas. Stir in the chopped chocolate.
4. Stir the vanilla into the buttermilk and add all at once to the dry ingredients. Stir with a fork just until the dough comes together in clumps.
5. Knead the dough in the bowl 2 or 3 times, folding the dough over itself, just into a rough ball and then transfer to a lightly floured surface. There will be floured bits still left, just press them into the dough as you go. Cover with plastic wrap or parchment paper, and roll or pat out to 1 inch thick. Cut into 2 inch rounds with a biscuit or cookie cutter dipped in flour. Make sure to push the cutter straight down and pull back up without twisting so that the biscuits will rise evenly. Place the rounds on the prepared baking sheet in two rows spaced about 2 inches apart. (You can re-roll the scraps once, any more than that and you risk kneading the dough too much and you’ll end up with tough biscuits) Bake in preheated oven for 10-12 minutes, the biscuits will be very fragrant and the tops will look dry. Allow to cool slightly, they can be served warm or at room temperature but I tend to prefer them warm.
6. To serve: Place the whipping cream and vanilla in a medium mixing bowl. Beat on high until frothy, add the sugar and continue to beat until stiff peaks form. Cut open a biscuit on a plate, spoon some strawberries with juice over one side and dollop with cream. Top with the other half of the biscuit and enjoy!
Maple Pecan Muffins
I have been writing and deleting what to say on this post for about two days now. I hate writer’s block. So rather than drag it out longer than it needs to be I’ll simply tell you these muffins were amazing. Like, I ate 4 in a row as soon as they came out of the oven. They are moist but the top has a delightful crunch from the toasted pecan streusel. They are just sweet enough with a mellow maple flavor enhanced by dark brown sugar and browned butter. I’ve also made them twice in the past two days which is maybe why I haven’t been able to think of anything to write 😉
I added a pure maple flavoring that I found at King Arthur flour that I definitely think helps out since real maple syrup on its own tends to be a rather subdued flavor when baked. I got the idea of the browned butter from Joy the baker’s recipe adaptation and now I can’t imagine a muffin without it 🙂
One Year Ago: Boston Cream Donuts
Two Years Ago: Crescent Jam and Cheese Cookies
Maple Pecan Muffins
Yields 10-12 muffins
Ingredients:
1/4 cup whole pecans
1/4 dark brown sugar, lightly packed
1/4 cup flour
2 tablespoons melted butter
6 tablespoons unsalted butter, softened
1 1/2 cup flour
3/4 cup dark brown sugar, packed
3/4 teaspoons baking soda
1/2 teaspoon baking powder
1/4 teaspoon salt
1/2 cup sour cream
1/4 cup buttermilk
1/4 cup maple syrup
1 large egg
1 1/2 teaspoons natural maple flavoring (available at King Arthur Flour)
Directions:
1. Preheat oven to 400 degrees F. Grease muffin cups or line with muffin liners.
2. For the streusel: Place the pecans on a baking sheet and toast in the oven for about 5 minutes or until fragrant. Remove from the oven and let cool slightly. Roughly chop the pecans leaving some larger chunks and combine with the 1/4 brown sugar and 1/4 cup flour in a small bowl. Pour the 2 tablespoons melted butter over the mixture and stir until combined. Set aside.
3. Browning the butter: Melt the 6 tablespoons of butter in a medium sauce pan over medium heat. Continue cooking, swirling the pan occasionally, until the butter stops foaming and browned bits start to form at the bottom and the butter has a nutty smell, about 5 minutes. Immediately pour into a small bowl to cool slightly.
4. For the muffins: In a medium bowl combine the flour, 3/4 cup brown sugar, baking soda, baking powder and salt with a whisk or fork to break up any brown sugar lumps. Set aside. In a small bowl (or 2 cup pyrex measuring cup) whisk together the sour cream, buttermilk, maple syrup, egg, and maple extract. Pour the wet ingredients and browned butter over the dry ingredients and gently mix just until combined (batter will be thick).
5. Using a 1/4 cup measuring cup scoop batter into muffin cups and sprinkle with streusel topping.
6. Bake for 16-18 minutes or until golden brown and a tester inserted in the middle comes out without batter. Let cool slightly on a wire cooling rack and serve warm or at room temperature.
Honey Glazed Grapefruit Cake
My favorite winter citrus hands down is grapefruit. Probably because my late grandparents used to spend every winter in Florida and would send us boxes of it so the fruit became a winter staple in our house. Typically I’m a purest when it comes to eating it though, just cutting it in half and eating out the sections with a spoon… no honey, no sugar, just pure, bitter sweet grapefruit. But after trying it in a tart last year, I’ve been looking for more ways to use it in my baking. My first attempt was with a fluffier cake and a more bruleed approach to the grapefruit but the textures were all off. Second time proved to be the charm here and I’ll definitely be making this cake more often 🙂
I love a dense pound cake and this one is just that. Dense but moist from the yogurt with a wonderful tender crumb. It’s not overly sweet and it has a subtle hint of bitter sweet grapefruit. The sweeter honey glaze compliments it perfectly especially when eaten with the fresh grapefruit compote. It’s perfect for breakfast, mid-morning snack, afternoon snack…yeah I’ve eaten half the cake in the first couple hours 🙂
One Year Ago: Mini Jam Swirled Butter Cakes and Fluffy Breakfast Biscuits
Honey Glazed Grapefruit Cake
Adapted from The tasteful life and Smitten Kitchen
Yields 10-12 servings
Ingredients:
3 cups flour
1/2 teaspoon baking soda
1/2 teaspoon baking powder
1/2 teaspoon salt
1 cup (2 sticks) unsalted butter, softened
1 1/4 cups sugar
4 large eggs, at room temperature
1 tablespoon vanilla extract or vanilla bean paste
2 tablespoons grapefruit zest (about 1 very large grapefruit or two medium-large…very exact I know 🙂 the one I used was larger than a softball and I had a hard time keeping my hand around it)
1 cup greek yogurt, at room temperature
1/3 cup honey
2 tablespoons light brown sugar
3 tablespoons unsalted butter
1/2 teaspoon vanilla
1 large grapefruit
2 tablespoons honey
Directions:
Directions:
1. Preheat oven to 350 degrees (F). Generously butter and flour a 10 cup Bundt pan.
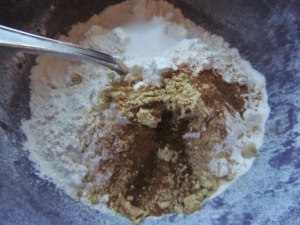
In a large bowl, whisk together the flour, baking soda, baking powder and salt. Set aside.
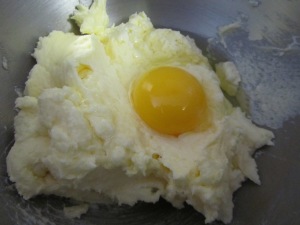
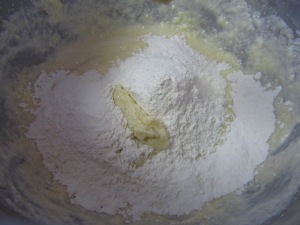
2. In another large mixing bowl (or standing mixer fitted with paddle attachment) cream the butter on medium speed (about 3 minutes). Add the sugar and continue to beat at medium speed until light and fluffy, about another 3 minutes, scraping down sides and bottom of bowl with rubber spatula frequently. Add eggs 1 at a time, beating well after each addition, scraping down sides of bowl as necessary. Add the vanilla and zest and beat to combine. Reduce speed to low and add flour mixture in three parts, alternating with the yogurt, and beginning and ending with the flour. Be careful not to over beat.
3. The batter will be thick so spoon it into the prepared bundt pan and spread with evenly with a spoon. Bake in preheated oven for 45-50 minutes or until a cake tester inserted in the middle comes out clean. Remove from oven and let cool in pan for 5-10 minutes then invert onto a wire cooling rack to cool completely.**You actually don’t have to wait for this cake to cool completely but give it at least a half hour before glazing it. I do like it warm 🙂
4. For the glaze: Combine the honey, brown sugar and butter in a small pot and cook over low heat stirring constantly until the sugar is completely dissolved and the mixture is smooth. Stir in vanilla. Remove from heat and let it sit for a minute. Place the cake on parchment paper (this will become a sticky gooey (yummy) mess!) Using a small pastry brush, brush the top and sides of the cake with the honey glaze to completely cover the outside. Pour the rest of the glaze over the top evenly.
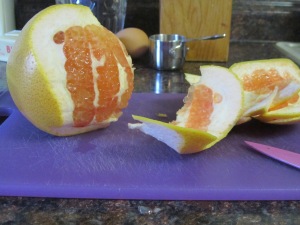
5. For the grapefruit compote: Supreme the grapefruit by cutting the top and bottom of the fruit off. Then peel the grapefruit from top to bottom with a small paring knife, following the contour of the fruit and making sure to remove all pith (white part). Next, run the knife between the membranes and fruit segments to remove the individual segments. Cut the grapefruit segments into 1 inch chunks and place in a small bowl. Drizzle the fruit with 1-2 tablespoons of honey and let sit for a minutes before serving alongside slices of cake.
Pecan Streusel Stuffed Cupcakes with Grand Marnier Buttercream
 Happy end of 2012! I hope you have all enjoyed your holidays and I wish you a happy and healthy new year!!
I’ve realized this year that working full time combined with taking care of three little humans that call me mom does not leave much time for baking, let alone blogging about it. So I’m squeezing in one last dessert to close out a rather crazy year.
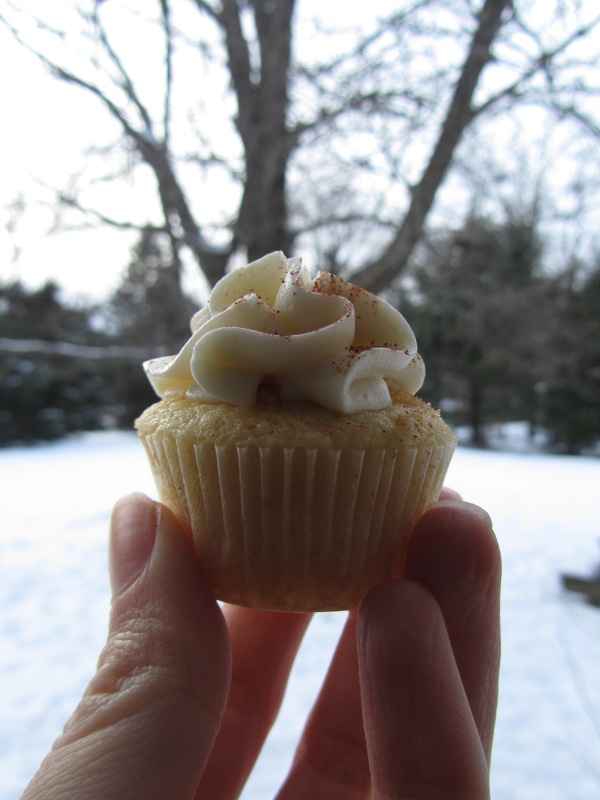
I’m not really sure what to even call these…I kinda just used a lot of stuff that I had leftover after the holidays 🙂 Basically its my moist stand-by vanilla cupcakes made in minis, filled with a pecan-cinnamon streusel and topped with a grand marnier buttercream. Orange and cinnamon is one of those wonderful holiday combinations and I love the unexpected texture of the toasted pecans when you bite into the cupcake.
One Year Ago: Grand Marnier Souffles
Pecan Streusel stuffed Cupcakes with Grand Marnier Buttercream
Yields 48 mini cupcakes or 12 standard size
Ingredients:
1 1/4 cup plus 2 tablespoons flour
1 teaspoon baking powder
1/4 teaspoon salt
1/2 cup unsalted butter, softened
1 cup sugar
2 large eggs, at room temperature
1 teaspoon vanilla extract
1 teaspoon vanilla bean paste (optional)
1/2 cup milk, at room temperature
2 ounces pecans toasted, once chopped should be about 1/4 cup
3 tablespoons brown sugar
1 tablespoon butter, melted
1/4-1/2 teaspoon cinnamon (taste to your liking)
1/2 cup unsalted butter, softened
2 cups confectioners sugar
2 tablespoons grand marnier
zest of a quarter to a half of an orange, also to your liking-I actually didn’t have it at all in the pictures here
Directions:
1. For the cupcakes: Preheat oven to 350 degrees (F). Line 2 cupcake pans with liners.
In a medium bowl, stir together the flour, baking powder and salt and set aside.
2. In a large bowl, cream the butter at least 3 minutes or until the butter is the consistency of mayonnaise (gross I know!). Gradually add sugar and continue to beat until light and fluffy (about another 3 minutes or so). Add eggs one at a time, scraping down the bowl in between each addition. Beat in vanilla and vanilla bean paste. Add flour in two parts alternating with the milk and beginning and ending with the flour.
3. Fill the cupcake liners about 1/2 full. Bake in preheated oven for 10 minutes for mini size and 18 minutes for regular cupcakes. Let cool in pan for 5 minutes before removing to a wire rack to cool completely.
4. For the streusel filling: Place the toasted and chopped pecans, brown sugar, melted butter and cinnamon in a small mixing bowl and stir with a fork until completely combined.
5. For the buttercream: Beat the butter in the bowl of an electric mixer, or with a hand mixer, for several minutes, until very light and fluffy. Slowly add the powdered sugar, a 1/2 cup at a time. . When icing is slightly thicker than spreading consistency, drizzle in the grand marnier and orange zest and beat until smooth and spreadable. If this has made the frosting too thin (it shouldn’t, but just in case) beat in another spoonful or two of powdered sugar.
6. To assemble: Using a 1/2 -inch round pastry tip (for mini cupcakes, for standard size use a 1 inch), cut the centers out of the cooled cupcakes. You want to go most of the way down the cupcake but not cut through the bottom about 2/3 of the way. Twist the pastry tip gently and the cake should come right out. You can then clean out the pastry tip with a thin knife. Fill the cupcakes with a little bit of the streusel to fill the hole. Frost with the buttercream and enjoy!
Gingerbread Pancakes
Last Fridays events hit pretty hard. I couldn’t quite express in words how I felt but my heart ached for the families affected by such a horrific tragedy. Suddenly nothing else really seemed that important…my kids rooms really weren’t that messy, the stack of work at my desk seemed insignificant and I set everything aside to spend time with my children. We went out for pizza, we went shopping together, we snuggled and watched beauty and the beast and as I tucked in my 3 year old for the 9th time I thought, “I’d rather tuck him in 20 times tonight then not be able to at all.” I don’t have anything profound to say and truly I don’t know the pain that the parents in Connecticut are going through right now but my prayers are with them. If you’d like to help out in any way, here is a link to an article where you can donate to their local charities or send them a meal.
How to help the community of Newtown
Breakfast is a big deal for our family during the holiday season. It’s about the one time during the day that we can sit in some peace and quiet and just enjoy the meal before chaos starts. I always like to add one special, more festive dish. Last year it was eggnog french toast so this year I decided to go the gingerbread route and make some pancakes 🙂 They smell like Christmas and are full of that wonderful molasses-ey, ginger flavor. These can be as spicy as you want, the spices as I have them written are a nice middle ground for kids who may not like an overly spiced pancake and adults who want some kick, but feel free to add more as you like! The pancake is thicker and heartier than a plain buttermilk pancake. I served them with butter and maple syrup but for a little something extra you can dollop them with eggnog whipped cream!
One Year Ago: Old fashioned sugar cookies
Gingerbread Pancakes
makes about 10 pancakes
Ingredients:
1 1/2 cups flour
2 teaspoons baking powder
1/4 teaspoon baking soda
1 1/4 teaspoon cinnamon
1 1/4 teaspoon ground ginger
1/8 teaspoon clove
1/8 teaspoon nutmeg
1/2 teaspoon salt
3/4 cups milk, at room temperature, plus 1/4 cup for thinning batter
1/2 cup sour cream
1/4 cup molasses
3 tablespoons unsalted butter, melted and cooled
2 large eggs, at room temperature
1/2 teaspoon vanilla extract
canola oil for greasing the griddle (slightly-we’re not deep frying the pancakes!)
Directions:
1. Preheat stove top or electric griddle to medium low.
2. Whisk together in a large bowl, flour, baking powder, baking soda, cinnamon, ginger, cloves, nutmeg and salt. Set aside.
3. In another bowl, whisk the milk, sour cream, molasses, butter, eggs and vanilla. note: I set out the milk and eggs about 1-1 1/2 hours before I make the pancakes, the ingredients just come together better.
4. Pour the wet ingredients over the dry ingredients and gently whisk them together, mixing just until combined. Batter will be thick and slightly lumpy. *If the batter is thicker than you like you can add a little more milk a few tablespoons at a time-just be careful not to overmix!
5. Using a 1/3 measuring cup, pour batter onto hot, greased griddle. Cook on first side until edges are slightly dry and un-popped bubbles appear on the surface. Flip and cook until the underside is lightly browned. Serve immediately or keep warm in a 200 degree (F) oven while you finish cooking the rest.
Pear Tarte Tatin with Red Wine Caramel
 I love the Holidays. So much so that I tend to go a little crazy and invite say 35 family members over for Thanksgiving and put up a tent in my backyard to host them all. The truth is I love my family, every single crazy one of them, and I love nothing more than to cook for them so I spend the preceding two months planning color schemes, table decor, the menu and of course the dessert table. We have our standards like maple pumpkin pie with bourbon whipped cream, decadent pecan pie and dense, creamy cheesecake but I always like to include one new, maybe slightly over-the-top dessert.
When I first saw this tart on food and wine’s website I passed it over because it sounded too time consuming. But I couldn’t shake the image of the deep caramel dripping over the pears and after going back to it 3 or 4 times I had to include it in this year’s menu. It does take a little longer than other desserts but its not difficult to make, it just requires a little extra love and care 🙂
The time is worth it! Red wine caramel is every bit as good as it sounds and when paired with sweet pears it just becomes amazing. The original recipe calls for a puff pastry crust but I used an all butter pie crust that’s super flake-y and balances out the richness of the caramelized fruit. Not to mention it’s also beautiful! The crust drapes over the fruit before going into the oven and creates a ruffled edge when baked. This is best served warm with a little whipped cream 🙂
One Year Ago: Eggnog French Toast
Pear Tarte Tatin with Red Wine Caramel
Recipe from Food and Wine with slight modifications
Yields 6-8 servings
Ingredients:
Pie Crust
2 cups dry red wine, don’t skimp here, this will be a significant flavor in the dish
2 cinnamon sticks
1/2 cup sugar
1/4 cup water
2 tablespoons unsalted butter, soft
4 firm, ripe bartlett pears, peeled, cored and halved
Directions:
1. Make the pie crust, I halved this recipe. Do steps 1-3 rolling out to a little over a 10 inch circle. Place the rolled out dough on a large piece of plastic wrap and using a 10 inch cast iron skillet as a template cut out a 10 inch circle. Wrap the dough in plastic wrap and place it flat in the fridge to chill completely.
2. In a small saucepan, bring the wine and cinnamon sticks to a boil over medium high heat and simmer until reduced to 1/4 cup, about 15 minutes. Discard the cinnamon sticks.
3. Preheat the oven to 375 degrees (F). In a 10-inch cast iron skillet, combine the sugar and water. Cook over medium high heat, swirling the pan occasionally, until a light-amber caramel forms, about 5 minutes. Remove from the heat. Carefully add the reduced red wine and butter. Return to low heat and stir constantly with a wooden spoon to dissolve any hardened caramel, about 1 minute. Add the pear halves to the skillet and cook over low heat, turning occasionally, until the pears are tender and the pan juices are syrupy, about 20 minutes. Arrange the pears cut side up in the skillet with the thin ends pointing toward the center and remove from heat.
4. Take the pie crust out of the fridge, unwrap and cut 4 steam vents. Lay the crust over the pears, carefully and gently tucking the edge into the skillet. Bake for 45-60 minutes or until the crust is a deep golden brown. Let the tart cool in the skillet for 15 minutes, then very carefully invert the tart onto a large plate or cake platter lined with parchment paper. Serve warm with whipped cream.
